Machine monitoring with PE strain sensors
The Kistler Group now offers machine monitoring solutions that feature sensors integrated into a machine’s mechanical and electrical environment. These solutions leverage Kistler’s wide-ranging portfolio and the Group’s extensive industrial expertise – so only those sensors that are actually necessary will be installed at defined positions in the machine. This approach minimizes both the complexity and cost of the machine monitoring system, although integration of the sensors into the machine’s mechanical and electrical structures can still be challenging.
Sensor type and position are critical success factors in capturing highly dynamic processes with maximum accuracy. The sensor must be placed close to the cutting point in such a way that it does not interfere with the machining process – but at the same time, it should not be subject to any influences other than the actual cutting. Monitoring of cutting forces plays a key part in ensuring the stable machining operations that are needed to produce tight-tolerance components. Customers who opt for machine monitoring solutions of this sort can also advance towards autonomous machining – and reduce their total machining costs as they do so.
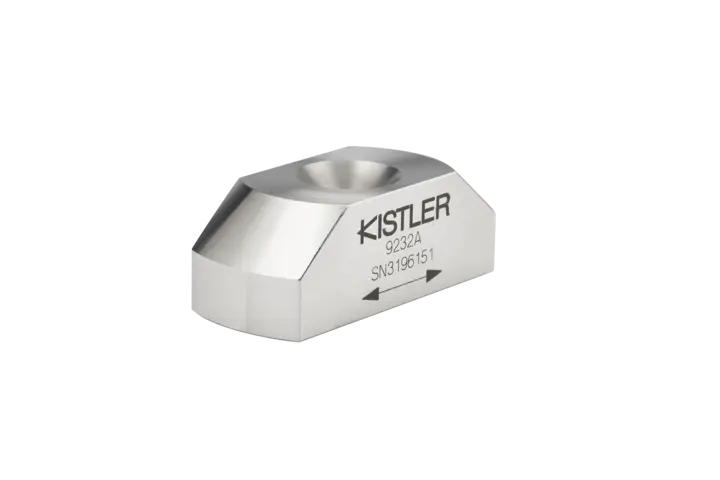
One way to capture the cutting forces is by measuring the deformations forces acting on the machine tool structure. This can be achieved with PE surface strain sensors attached to (or integrated into) the machine structure (see Figure 1 and 2). In a recent project with Minganti Global AB, vertical lathes were equipped with an integrated Kistler PE surface strain sensor 9232A, which offers the high sensitivity needed to measure both tensile and compressive strains on a surface thanks to a measuring range of ±600 µε.
Minganti, founded in 1919 at Bologna (Italy), numbers among the market leaders in hard turning and honing machines used for high-precision manufacturing of bearings and other components in the aerospace, industrial and automotive sectors. Minganti is now headquartered in Sweden and has an installed global base of several thousand machines.
“By measuring cutting forces in the machine monitoring system developed with our partner Kistler, we are also taking an important step towards profile accuracy control through intelligent programming.”
Marcus Caldana, President of MINGANTI GLOBAL AB
Indirect cutting force measurement close to the cutting edge
The new machine monitoring system serves multiple purposes: it is intended to detect high tool wear and tool breakages, and to stop the machine in case of crashes. Also, once force control is established on the basis of precise measurement data, it can be used to monitor and improve profile accuracy. The large radial forces that occur in hard turning cause elastic deformation of the ram that carries the cutting tool holders (see Figure 3). The deformation is very small, and it can be partially compensated by the machine control unit – but even so, it is still large enough to be captured by a strain sensor with good accuracy: in this case, the 9232A from Kistler, located very close to the cutting edge.
Machine monitoring can also be based on machine signals – but in this application, the quality depends both on the machine type and the state of wear. Figure 4 shows a comparison of the power signals of linear axes with the strain sensor measurements. As can be seen, the machine signals sometimes show deviations that are unrelated to the cutting process, so they are not suitable for a machine control system targeting tool wear or product quality
Minganti and Kistler decided to install a second sensor to complete the machine monitoring solution: this provides a certain redundancy, and also takes account of the high cost of parts. For this purpose, an 8274A single-axis PE accelerometer from Kistler was additionally integrated into the ram (see Figure 3). It complements the force (strain) measurements by supplying higherfrequency measurements so that sudden changes in the process can be detected. Both sensor inputs are processed with a digital charge amplifier from Kistler (Type 5074B) which is connected to the machine control via PROFINET. One of the major advantages of this charge amplifier is that its users can automatically perform low- and high-pass filtering, making it easy to focus on the highly dynamic part of the signal.
Achieving high surface profile accuracy – with no extra effort
The extended machine monitoring system is used to monitor tool wear, detect tool breakage, and to detect and control machine crashes. It automatically learns the regular signal levels and then monitors the changes so as to detect deviations. This allows operators to initiate necessary actions such as tool changes, machine stops, and others. Tool failures (breakages, edge chipping, etc.) can be caused by various reasons including incorrect cutting data loaded in the NC, low cutting-edge quality, wrong coolant pressure, or rings that are too oval leading to major changes in cutting depth with each rotation. When such failures occur, their effect is clearly visible in both the force and vibration signals (see Figure 5).
One of the most important quality parameters for bearing components is the profile accuracy (or ‘straightness’) of the surfaces. This parameter affects the friction between the rolling elements and the rings in a bearing. Maintaining tight tolerances (3-6 µm) on a large-size ring (1 to 2 meters in diameter) is a challenging aspect of the hard turning process; this is why many bearing producers perform grinding or honing as an extra step. The Kistler machine monitoring system can indirectly measure the strain (deflection) of the tool, so the profile accuracy (form deviation) is clearly visible on the strain (indirect force) signal (see Figure 6). The force signal input can be used directly during the turning operation to change cutting conditions with the help of closed-loop control (patented by Kistler) – so deflections can be compensated.
Marcus Caldana, President of MINGANTI GLOBAL AB, adds: “We know that profile accuracy in particular is a direct function of certain cutting forces. By measuring cutting forces in the machine monitoring system developed with our partner Kistler, we are also taking an important step towards profile accuracy control through intelligent programming.” In a joint follow-up project, Minganti and Kistler are developing special tool clamping housings with integrated PE sensors. The measured cutting forces can be used as a reference to develop and validate various sensor strategies for hard turning machines.


![Close to the cutting edge [object Object]](https://kistler.cdn.celum.cloud/SAPCommerce_Document_Preview/961-991e.webp)