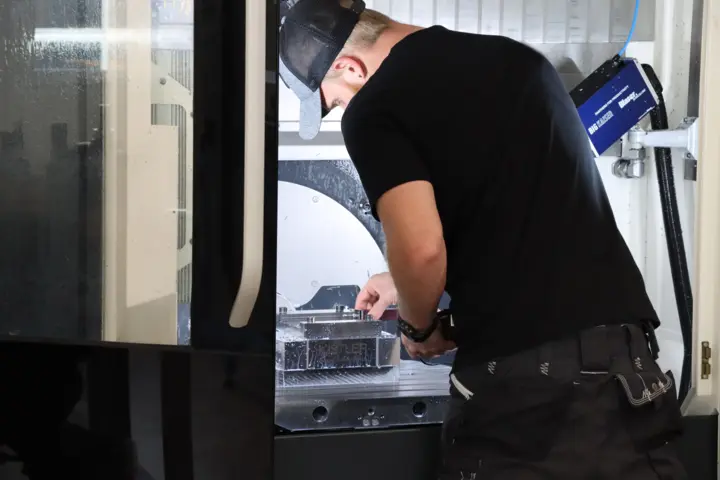
Software-assisted evaluation of performance comparisons
Marco Siragna has been Head of Product Management at BIG KAISER for the last two years. Together with two colleagues, he shares responsibility for a portfolio comprising a total of over 20,000 individual variants. Prior to this, he devoted five years to the development of special tools at BIG KAISER, so he is thoroughly familiar with the challenges that arise in this industry: “To give customers the best possible advice and supply them with optimal equipment, it's important to be able to assess and compare tools objectively. For years, we've been carrying out series of measurements here in house – because the manufacturers' information doesn't always match the truth. Our collaboration with Kistler has given us the opportunity to compare our results with additional measured values.”
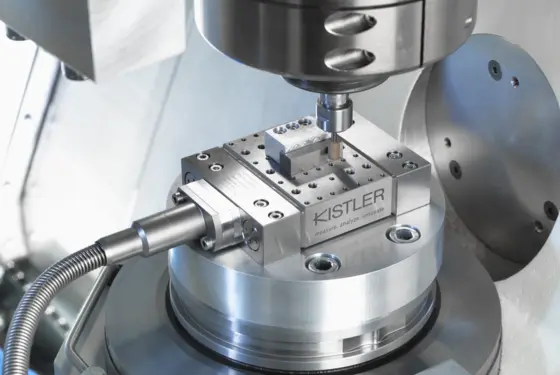
In the first stage of the benchmarking process, the BIG KAISER engineers focused on tool holders – or to be more precise, the product categories of collet chucks, milling chucks and hydraulic chucks. The measurement technology from Kistler that was used: the 9119AA multicomponent dynamometer, the LabAmp laboratory charge amplifier, and the Dynoware analysis software.
"This is the first time we've ever worked with external measurement technology. Thanks to simple handling and fast implementation, we were able to make a start on the benchmarking within one to two days. We had vigorous inhouse support with this from Denis Ruoff, our development engineer."
Marco Siragna, Head of Product Management at BIG KAISER
Accurate and efficient measurements and comparisons
Key parameters such as imbalance and runout accuracy were measured and compared for each tool holder, together with characteristics encountered during machining such as chip quality and noise emissions. “In three out of four categories, our products came out best – and that's a very welcome endorsement of our work, of course. We were able to contrast previous comparative methods with the new measured values, and we were also able to determine how far each product meets specific requirements,” Siragna notes.
In all the tests, a carbide boring tool was used on quenched and tempered steel (C45E); with a boring depth of 12 mm, the lateral stepover was gradually increased from 0.5 mm at the start to 6 mm. The tests showed that tool holders from BIG KAISER – especially in the collet chuck and hydraulic chuck categories – are best able to withstand the gradual increase in the stepover: although more vibrations occur, they remain constant and within the acceptable range. Some examples are shown in Figure 2.
“The software from Kistler is very good – it can actually do much more than we need for our purposes,” Siragna points out. “The results far exceeded our expectations, and we were able to obtain them efficiently. The real challenge here was to classify the measurement results correctly: how do you deduce an accurate statement from so many colored curves? Reinhard Bosshard of Kistler gave us outstanding support with this. He was able to draw on his experience with Dynoware to guide and assist us.”
What is the advantage of cutting force measurement as a way of evaluating the performance of cutting tools? Cutting force represents many combinations of tool and material in direct relation to a tool's life expectancy. By evaluating the force curves and trends, tool lifetime tests can yield conclusions about the wear mechanisms responsible for stress on the tool – and this provides the basis for developing appropriate improvement measures. Stability is also directly related to cutting force. This means that an influence on stability can be deduced from the dynamics of the forces, before any visible effects occur. Interesting insights into the process also become possible: for instance, the cutting force measurement shows at a glance whether the cutting point – the point in time when the tool penetrates the material – causes high force deflections.
Measurement data encourages sales and optimizes development
At BIG KAISER, the results of the comparative performance tests with measurement technology from Kistler can also be put to use for development work: “On the one hand, we have a much more accurate picture of our good points as compared to the competition, and we have a better idea of our weaknesses. That makes it possible to target our development work more precisely,” Siragna explains. “And on the other hand, we get arguments that our sales force can use, and we can tell the customer precisely what we view as possible or impossible. Or, for example, we can advise customers to invest in an expensive tool so as to achieve better results in the long term and cut their costs.”
Which other trends are shaping the industry? Siragna sums up the outlook: “In general, more and more sensor technology is being integrated directly into tools. As well as condition monitoring, there is a very definite trend towards networking all the systems and components in a production environment. This means that customers will increasingly be asking for tool data, which we can make available to them in a variety of formats. Industry 4.0 is a major focus and a key innovation driver for BIG KAISER. However, we don't simply latch onto every digitalization trend without a moment's thought. On the contrary: we examine exactly what we can implement, and how, and we ask what added value it will yield for the customer – in areas such as direct measurement systems or wireless control and monitoring systems, where a lot is happening at present.”


![Reliable control of boring and milling processes [object Object]](https://kistler.cdn.celum.cloud/SAPCommerce_Document_Preview/961-490e.webp)
![Bohr- und Fräsbearbeitung sicher im Griff [object Object]](https://kistler.cdn.celum.cloud/SAPCommerce_Document_Preview/961-490d.webp)